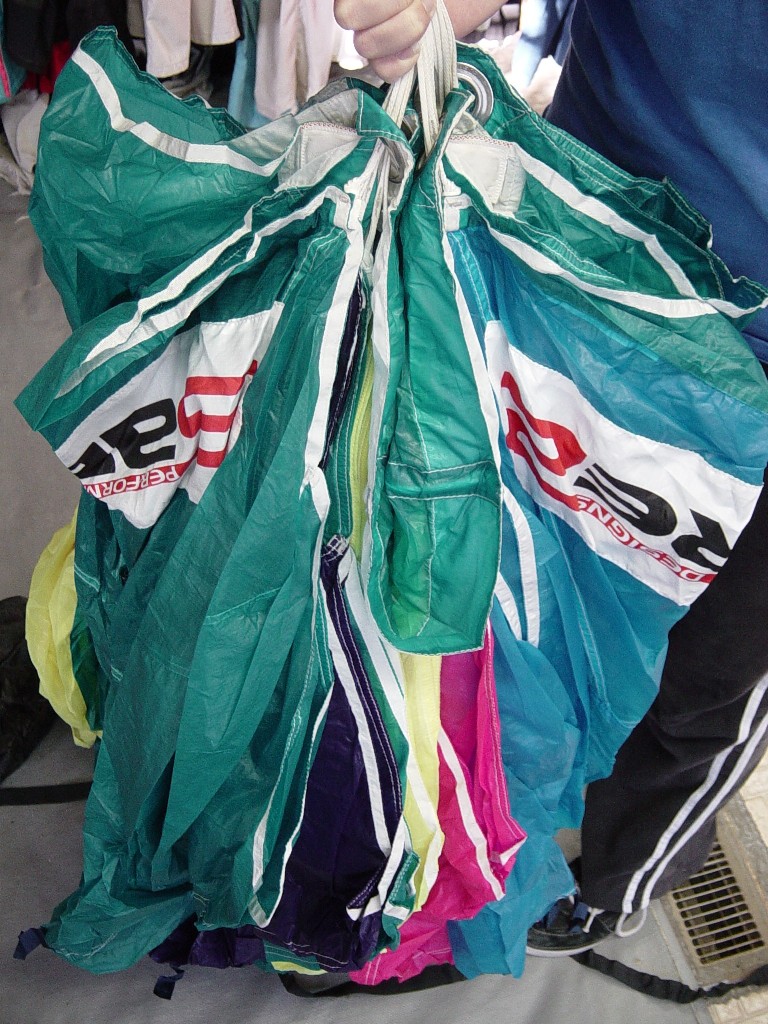
Correct Slider Placement (Green in the center)
From Parachutist Magazine, February 2003
Whack! You’re Open!
By Jim Crouch
You’ve just finished a skydive with your friends, the
formation breaks off, and you track away. You give a quick look over both
shoulders as you wave off, reach back and throw out the pilot chute and … WHACK!
All of a sudden, you are seeing stars. Every inch of your body is in pain, and
your eyes are watering so badly you can barely see where your canopy is flying.
Or worse yet, the canopy has suffered structural damage, and you need to
initiate emergency procedures while you are still dazed and confused.
You’ve just suffered a hard parachute opening. Many other
skydivers have also experienced this not-too-pleasant way of finishing a
freefall. In addition to the chance for injuries ranging from pulled muscles to
life-threatening trauma, hard openings can cause equipment damage ranging from
broken suspension lines to blown-up canopies to harness damage.
While the reasons for hard openings are many, most are
preventable and easy to avoid. As with many things in skydiving, it all boils
down to using proper equipment and procedures. Most of the solutions come before
you ever get to the point of throwing out your pilot chute.
Begin by reading the owner’s manual for your equipment. The
manufacturers have spent a great deal of time testing their products to
establish what works best for their containers or canopies. They include that
information in the owner’s manuals for their products. Parachute design and
materials, how it’s manufactured, packing, body position and deployment speed
all affect how a parachute opens.
Most of the parachutes built today are designed to snivel, or
momentarily trail above the jumper after deployment to decelerate the jumper
prior to inflation. An opening of this type can eat up as much as a thousand
feet of altitude or more before the parachute is fully open. Manufacturers built
this hesitation into canopies as a result of the shift from fabric that became
more permeable with age (“F-111”) to zero porosity (“zero-P”) fabric that
remains virtually non-porous throughout its entire life.
F-111 canopies may open in as little as 200-300 feet,
especially when they are new or nearly new. Jumpers expect F-111 canopies to
open quickly but not painfully so. As they get older and the fabric passes more
air, F-111 canopies will also begin to snivel.
Some jumpers have tamed their hard opening canopies by adding
a larger slider or having their existing slider modified by the factory or in
the field with a pocket on the leading edge to cup air. For any modification,
the manufacturer should be consulted first.
Correct Slider Placement (Green in the center)
If you have purchased a new canopy that opens hard and you
have consulted with a rigger on its compatibility with your system and how you
pack it, you may have a problem in the manufacturing. For various reasons,
canopies sometimes open hard as a result of a manufacturing defect. You may need
to send it back.
Most manufacturers recommend PRO packing their parachutes.
PRO stands for “proper ram-air orientation, meaning that the canopy is deployed
symmetrically; as opposed to flat packing, where the canopy is lain on its side
and stacked into S-folds.
PRO packing allows you to easily keep the line groups in the
center of the pack job and position the slider evenly inside the pack job where
it can be most effective. The slider needs to be all the way up the lines of the
canopy until the slider grommets contact the slider stops (discs sewn into the
stabilizer line junctions).
Splay the edges of slider evenly between the front, sides and
rear of the four line groups. Use the leading edge of the slider to help block
the ram-air inflation vents in the nose of the canopy, but pull it forward only
a few inches and be sure to leave the other edges in place between the other
line groups. Check your owners manual.
During the packing of the canopy and placement of the canopy
inside the deployment bag, it is important to keep the slider in place and not
allow it to sneak away from the slider stops. Giving the slider even the
smallest head start during the deployment can cause it to be less effective in
slowing down the inflation of the canopy. Some manufacturers even recommend
using a rubber band to keep the slider up towards the parachute during the
initial deployment and inflation if the canopy. But others are against that
idea, saying it delays slider inflation long enough for the canopy to force the
slider prematurely down the lines.
The tail, also called the trailing edge of the canopy, should
be wrapped according to the manufacturer’s instructions. The amount of wrapping
can significantly affect the opening. Wrapping it tightly, but without
disturbing the position of the D-lines and brake lines, also helps with getting
the canopy into the deployment bag.
Wrapping the tail around the canopy also pulls the D-lines
and brake lines around the sides of the canopy towards the nose So laying the
canopy down and pushing the air out requires great care. Lay the canopy gently
on the ground. Then, rather than folding the sides of the canopy under, fold
them upward toward the center. That helps keep the rear lines toward the center
of the bundle and behind the canopy where they belong. Folding the sides under
toward and the front often pulls the D lines and brake lines in front of the
nose, inviting a line-over malfunction. Once the lines are stacked safely on
top, you can take the outside skin of the center cell only and wrap it toward
the front to help control the bundle while you fold it into the deployment
bag.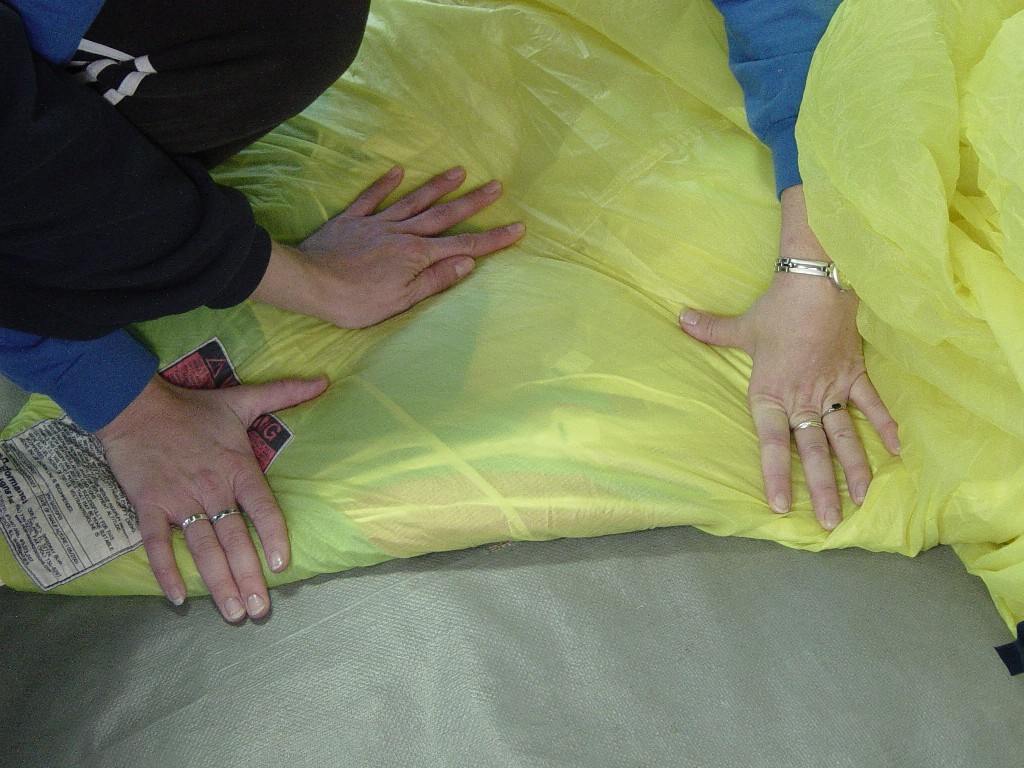
The D lines are pulled to the outside of the pack
job
Maintain control the canopy fabric and the slider while
folding the canopy for placement into the bag. Folding the bundle tightly and
evenly will help the canopy open slowly as well as on heading.
There are nearly a dozen different sizes and types of
suspension line in use on today’s parachute equipment. Most jumpers choose
smaller lines to reduce pack volume. For their high-performance models,
manufacturers prefer smaller lines that neither stretch nor shrink. All lines
have their strengths and weaknesses.
Dacron lines are generally thicker, but they stretch slightly
during opening. Stretch in the lines reduces opening shock considerably. Many
videographers, who need soft openings to reduce neck strain, prefer Dacron
lines. Nothing amplifies the forces of a hard opening quite like the weight of a
camera or two on your head.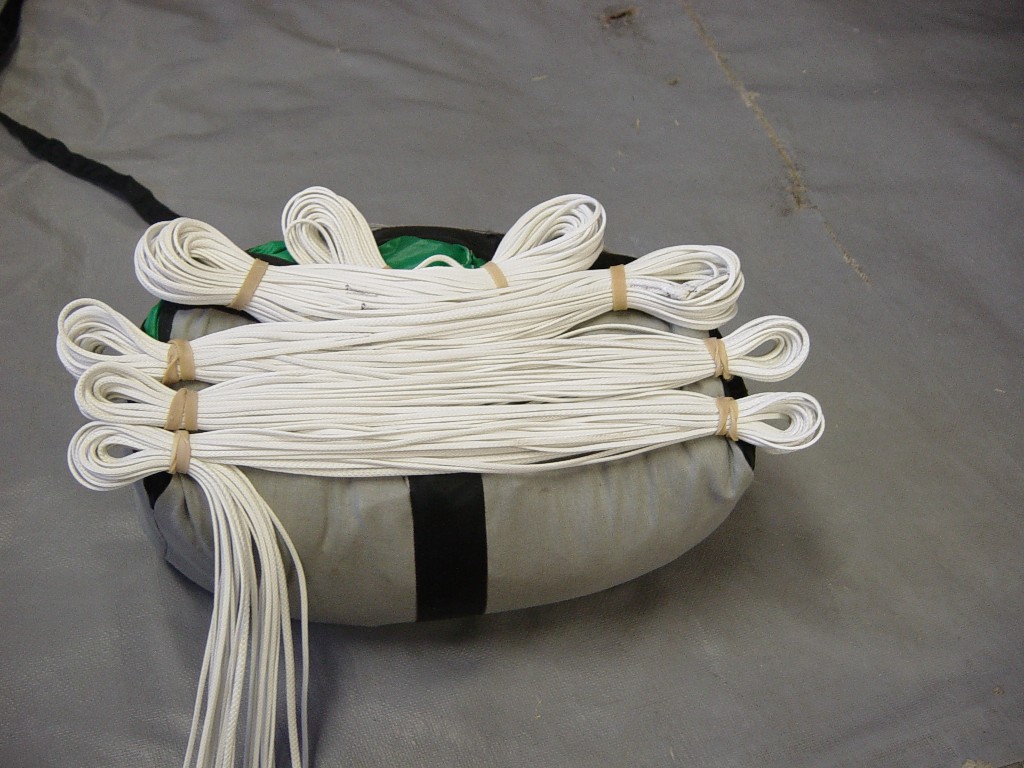
Dacron lines stowed correctly
Spectra (Microline) is smaller in diameter and stronger than
Dacron but it does not stretch when subjected to opening shock loads. This means
more of the opening shock will be transferred to the risers, harness and,
eventually, the jumper’s body. Over time, the movement of the slider down the
lines causes the Spectra lines to heat and shrink unevenly, which changes the
opening characteristics of the canopy. In as little as several hundred jumps,
the outside Spectra lines routinely shrink three or more inches shorter than the
inside lines.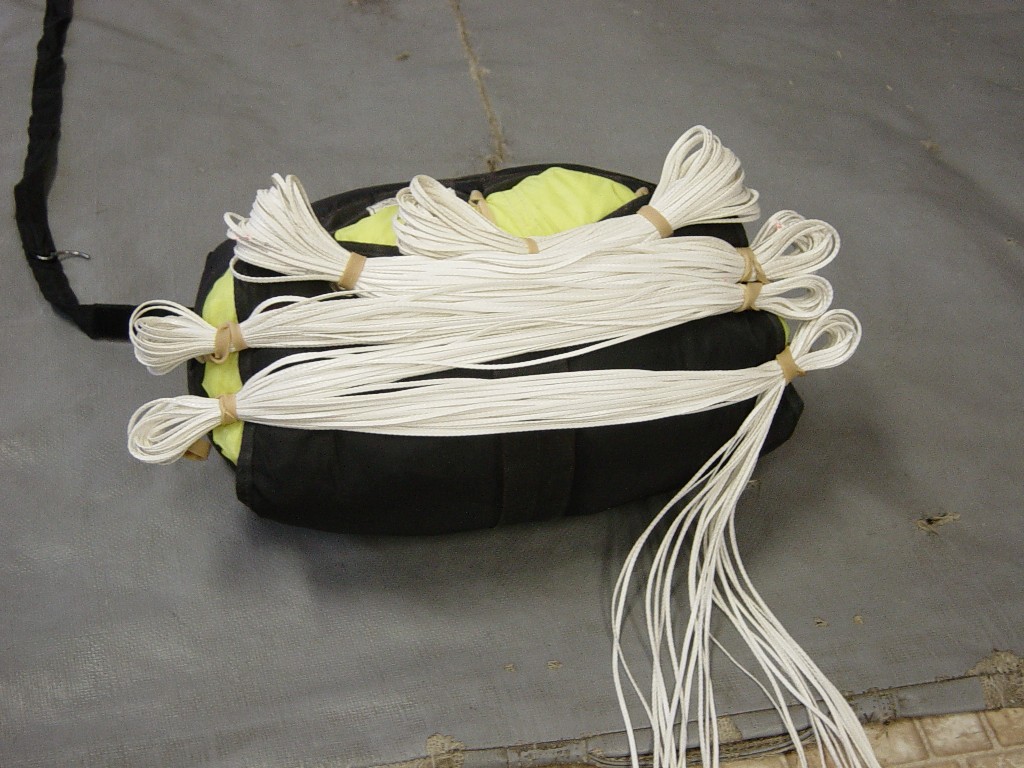
Spectra line stowed correctly
Manufacturers provide Vectran and High Modulus Aramid (HMA)
lines on performance canopies, because they don’t shrink with heat. On these
types of canopies, keeping the lines at their designed length plays a more
critical role than durability and controlling opening shock control. However,
both types of line fail with less warning.
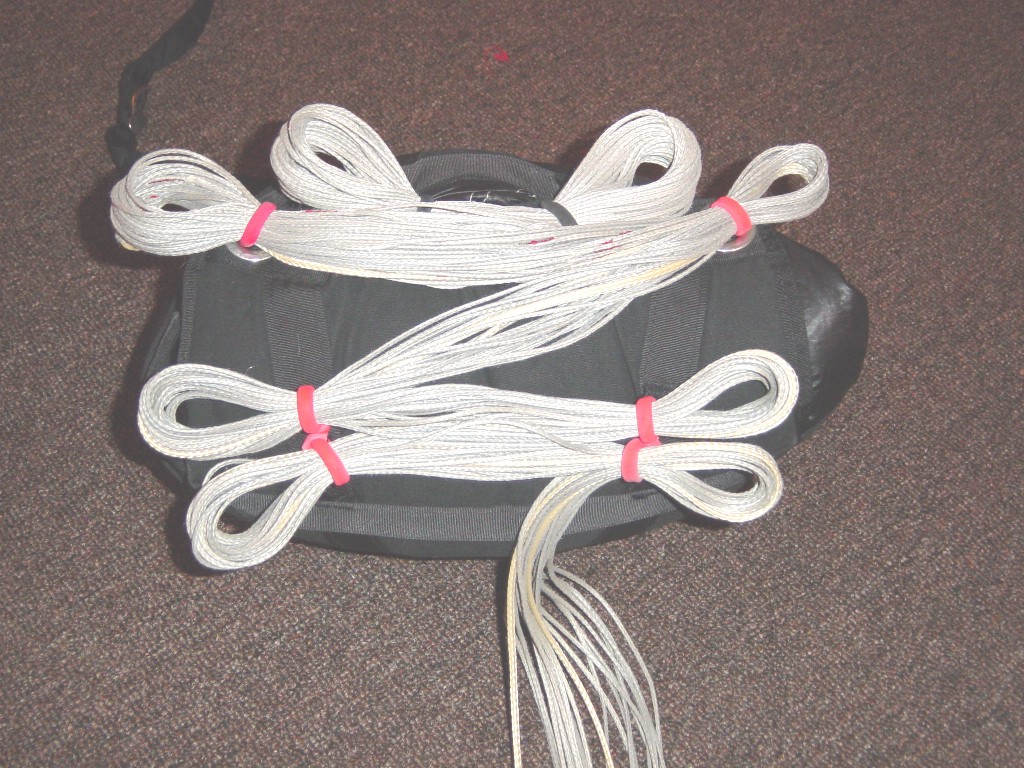
HMA lines with stows that are too large and the rubber
band is too loose. A new style main deployment bag with the line stows near the
center.
Each different type of line has good and bad points for use
as a parachute suspension line.
Regardless of the type or size of line, it is important that
the lines are stowed tightly during the pack job for a soft, orderly deployment.
One of the most critical and controversial parts of packing involves stowing the
suspension lines. There are nearly as many different opinions on how to do this
and what type of stow band to use as there are skydivers. But everyone agrees
that improper line stows cause a myriad of deployment problems from line-dump
(extremely hard opening) to bag lock (no opening).
It should take eight to 12 pounds of pull force to remove
each line stow from its band. A fish scale can be used to measure the pull force
if you are unsure about the tension. Ask a rigger to help.
Often, jumpers like to use bigger-diameter stow bands even
with the smaller-diameter lines for the first bights of line that keep the
deployment bag closed. Better distribution of the bulk almost always allows a
jumper to use the smaller bands for the first two stows, and that’s what most
manufacturers recommend. If it’s necessary to use a larger stow band there, the
objective remains to maintain eight-to 12 pounds of pull force.
Below the line cascades, the number of lines to each stow or
bight decreases, and by that point, the bag is closed and the packer is merely
organizing the remaining lines with the stow bands. Jumpers have varying
opinions about whether to “double stow” (twist the elastic band and loop over a
second time). Asking manufacturers about this doesn’t yield a clear answer here,
either.
Elastic stow bands come in a variety of sizes and materials.
The most common is the tan gum rubber bands the manufacturer sends free with
each new canopy. They come in two sizes, and the quality depends on the original
source and the age. They are cheap and easy to replace, but they don’t last very
long. Also, they stretch over time which may lead to looser line stows.
Several manufacturers offer similar-sized bands with a higher
rubber content that may last longer. One manufacturer, Performance Designs,
tested at least one brand and found them to be equal in breaking strength to
some tan stow bands. These bands are harder to use and can stretch over time,
typically less than the tan stow bands.
Tube Stows, a registered trademark, is the name of a hollow
stow band that resembles a snake eating its own tail. Most jumpers find them
easy to use, and they, too, generally last longer than the tan stow bands. They
also stretch considerably with use. Tube Stows have their fans and detractors
with many theories abounding.
Regardless which stowing method or band you choose, try to
keep the recommended stow tension, eight to 12 pounds throughout.
Manufacturers’ recommendations about how much of the bight of
line to pull through the elastic stow band range from two to three inches. It
depends on the line type and thickness of the bight. Larger line bights, such as
on tandem rigs or other canopies with thick lines, can tolerate three inches or
more past the stow band. The first two locking stows, where the bights above the
line cascades have the most bulk, also may work well around three inches.
As the bights become smaller, the tightness becomes more
important than the length of the bight. You’ll want to avoid loops so long they
can work their way around another bight of line. Looping over can cause a
variety of problems from line twist to even a bag lock. Using smaller diameter
bands in this area or double wrap the stow band to get sufficient tension.
(However, some believe that double wrapping can induce knots in the line.)
Line-dump occurs when the lines are dumped out of the stow
bands as the pilot chute extracts the deployment bag from the container. With no
stow bands to hold the bag closed, the canopy is released into the wind and
begins to expand before the jumper reaches the end of the lines. Line dump has
caused many hard openings over the years. Instead of slowing down gradually you
decelerate in a rapid and painful split second, causing damage to the equipment,
injury or even death. Make sure that the bands you are using hold each bite of
line with the proper tension. Stowing the lines loosely, requiring very little
pull force to free the line from the stow band invites line dump. If the bight
of line is too short it can also lead to line-dump.
Many manufacturers have also recently moved the location of
the band attachments more towards the center of the deployment bag. This helps
the bag stay straight as the lines pull out of the stow band, which can help
prevent line twists. It also allows
the proper length stow without having them wrap around the side of the
deployment bag.
Finally, make sure that your canopy fits your deployment bag
and your deployment bag fits the container. A canopy that’s too big might
overtax the stow bands when you try to get the bag closed, causing them to break
during deployment. A canopy that’s too small may expand too much in the bag
after it’s packed or cause poor tension on the closing stows.
In a nutshell, stow your lines tightly and neatly. And here’s
a tip: After you stow each bight, its band should stretch or lean toward the
center of the bag, keeping tension on the lines between the stows. Tension there helps support the bottom
of the bag and reduces the load on the closing stows as the pilot chute extracts
the deployment bag from the container.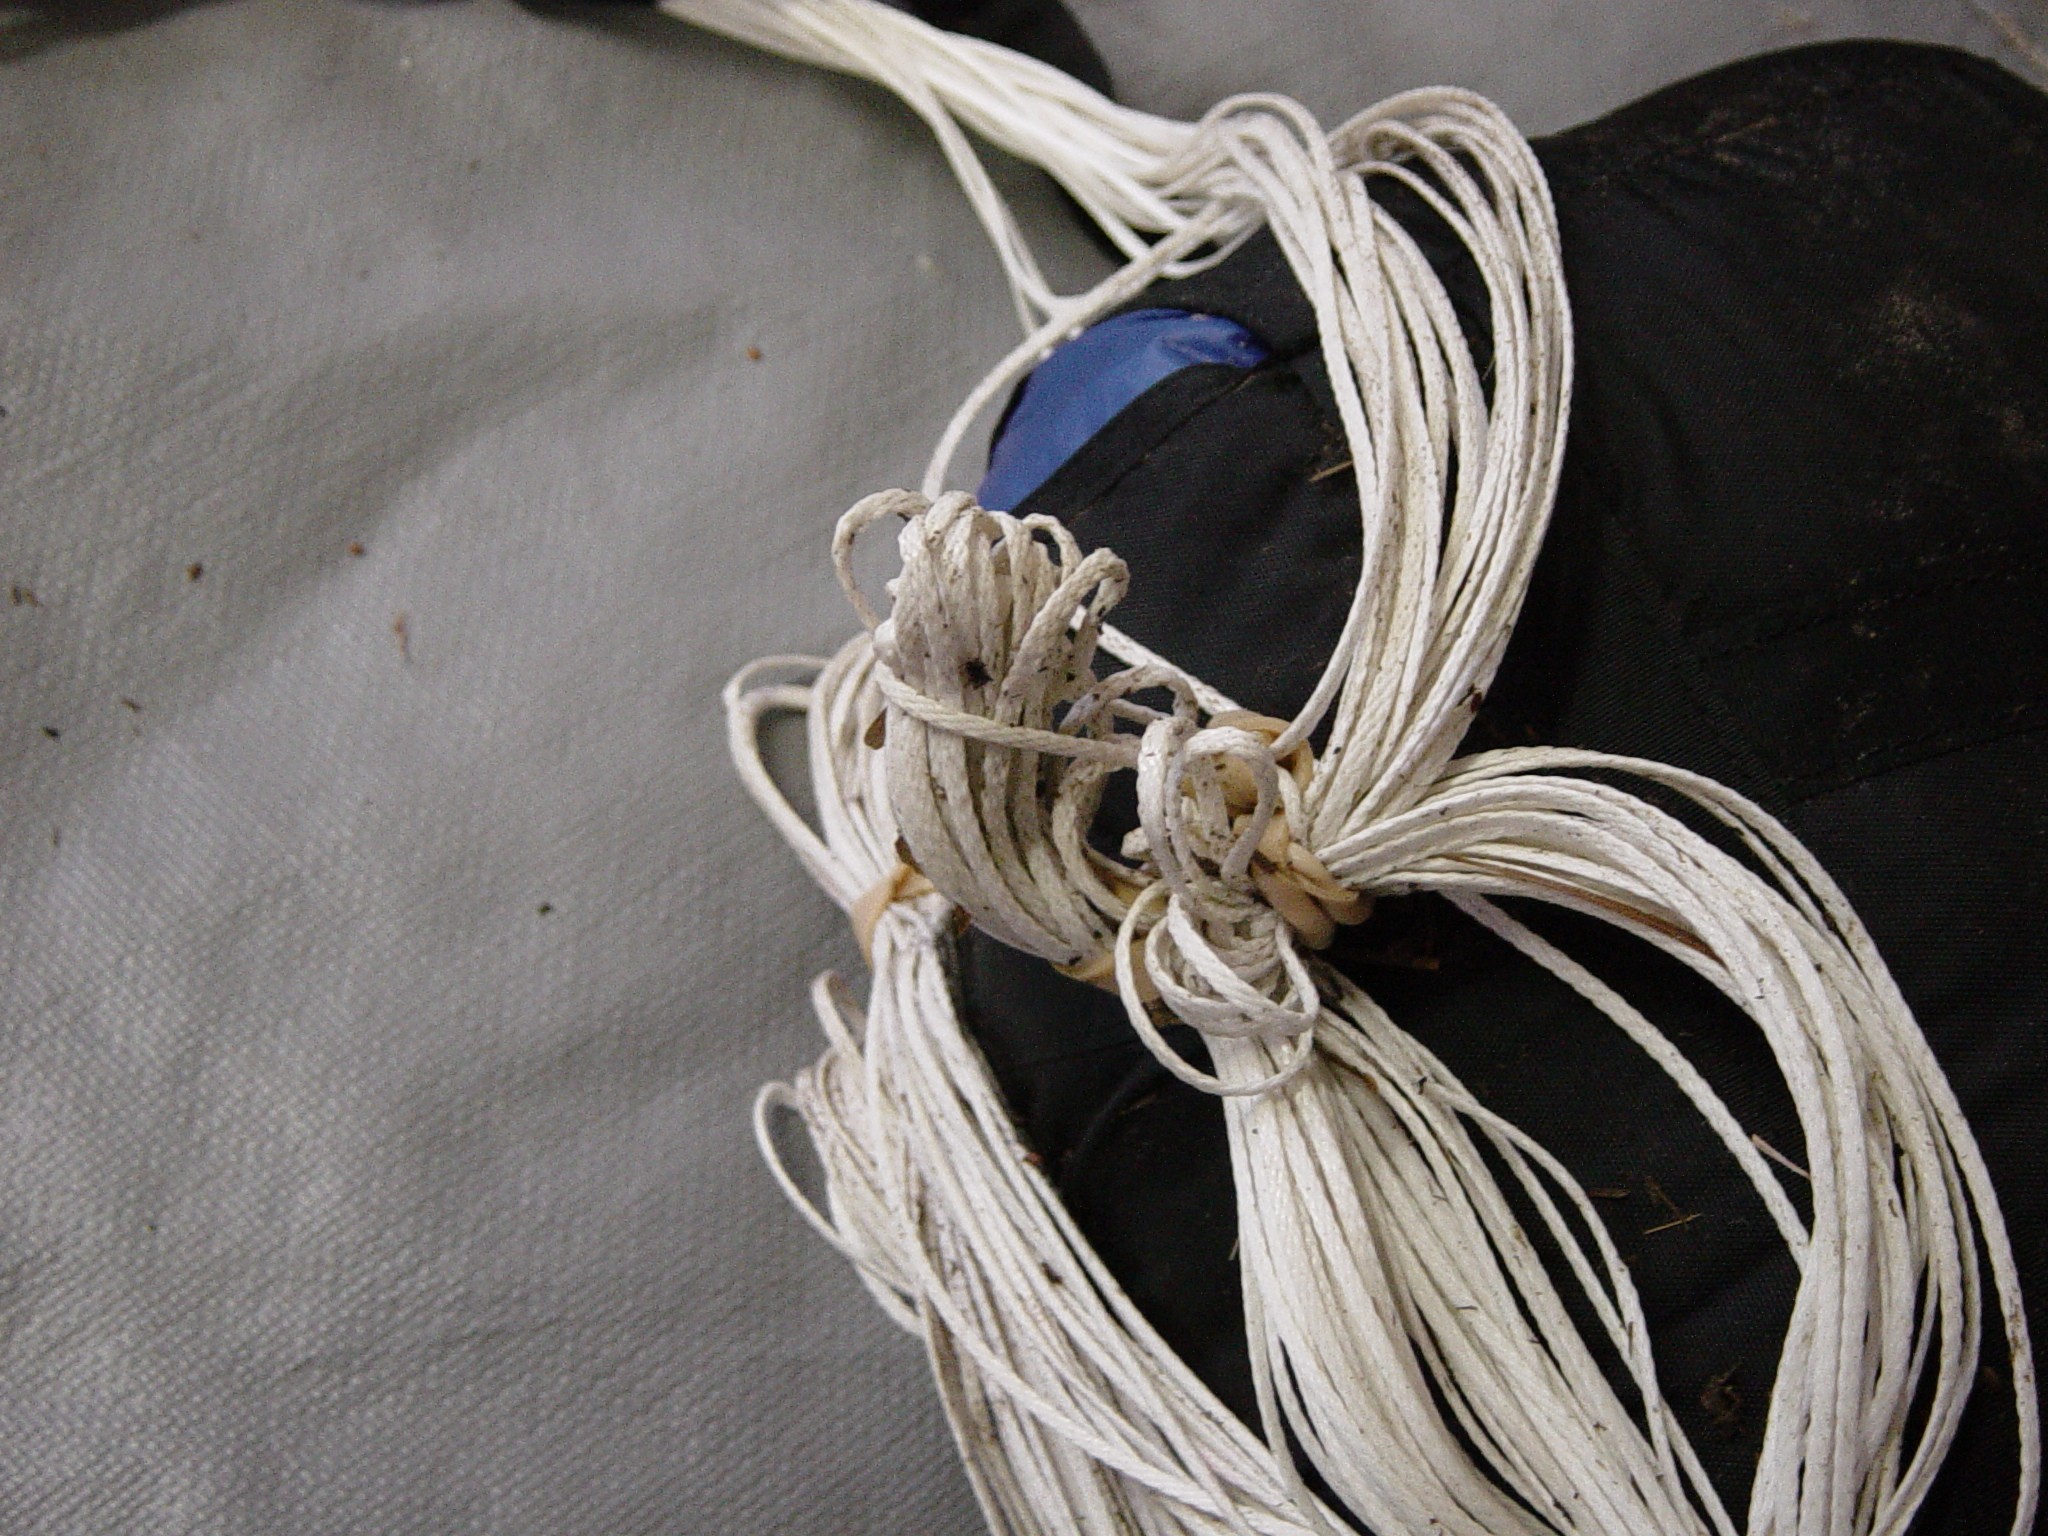
A Bag Lock Created by messy stows which were too
long
Pilot Chutes
Pilot chutes dramatically affect how your canopy opens.
Fabric type, design, diameter, maintenance and the length of the bridle all
figure into the equation. A pilot chute that is too large can lead to line dump
by creating too much drag and extracting (decelerating) the deployment bag too
quickly. A pilot chute that is too small, worn out or thrown lazily can lead to
a pilot chute-in-tow and no deployment at all.
Pilot chutes are supplied with containers when they are sold
new. Sometimes jumpers replace them with the another model when they wear out.
But it is a good idea to check your owners manual for the canopy you are packing
inside that container to see if the pilot chute size is recommended for the
canopy.
Deploying your parachute while flat and stable will help slow
your airspeed during the deployment. Many skydivers have opened their parachute
while still in a high-speed track position and suffered a hard opening. Freeflying requires a higher breakoff
altitude than flat flying, usually 4,500 to 5,000 feet AGL. Each jumper needs
time to slow down to normal belly-to-earth freefall speeds of 110 to 120 mph,
while tracking away from each other before the main canopy is deployed.
Some jumpers have experienced a premature deployment while
freeflying at speeds well in excess of the recommended maximum deployment speed.
The results are usually a sore skydiver from the fast opening. But a few people
have even been seriously injured or killed by the severe opening shock that can
occur at the speeds that are reached in a standing or head down position.
Tight closing loops maintained in good condition can not only
prevent a premature deployment or horseshoe malfunction, but also an
out-of-sequence deployment if the jumper hangs onto the pilot chute before
releasing it. Any time you cause a parachute to open abnormally, you’re inviting
a hard opening.
Hard openings are serious business, and no skydiver wants one
or should put up with them. Mostly, you can avoid them by making sure your
equipment is in order and by following a few guidelines during packing as well
as during the skydive and deployment.
Do your body a favor and pay attention to the basics. It will help you to have a long, healthy skydiving career.